You may have noticed some silence as of late, on flavorfull. For that, I am truly sorry. I won't bore you with my long list of excuses because, mostly, the excuses amount to me getting home at 8 or 9 and feeling very tired and incapable of cooking, photographing and writing about a meal. A lot of times I'm quite tempted to simply order Thai food again from the place around the corner. (A lot of times, I give into that temptation, too.)
I felt, at first, ashamed to admit this, given my love for cooking. But then I thought, it's possible that my readers wish they could cook more too. I mean, I cannot be the only girl in the world who loves to cook but consistently sees gourmet groceries go bad in her fridge. So, with that in mind (and just in case you've struggled with something similar) let me offer you my new favorite pantry staple recipe.
This meal is made with almost all things you can keep in your pantry, so if all of your ingredients go bad during a busy week or you're so busy you can't find time to go grocery shopping for proper produce you can still eat very, very well. Mujaddara also gets better with a little time, so it's ideal to make this on a Sunday and bring it to work as lunch on, say, a Tuesday. Plus, when paired with steamed green veggies, it's a very nutritious meal.
Mujaddara
Adapted by Alexandra Rogers from recipe on Food52.com
Ingredients
3/4 cup green or brown lentils
1 teaspoon salt
1 cup brown rice
2 Tablespoons butter
3 Tablespoons olive oil
6 cups thinly slice onions (about 3 medium onions)
Recipe
Cook rice and lentils according to instructions, set aside.
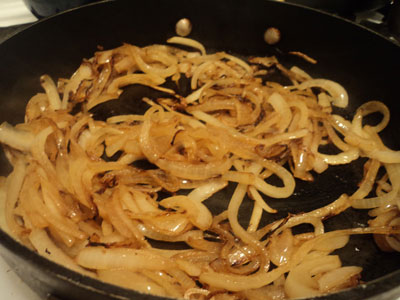
Divide onions in half. Heat oil in a large saute pan, and add half of the sliced onions once the oil is hot. Cook onions over medium low heat for 10-15 minutes, until caramelized (adding oil in small amounts if pan dries out). Repeat process with second batch of onions (alternatively, if you have two large saute pans you can do this step at once on two burners).
In a large bowl, combine rice, lentils and onions and stir to combine. Serves 4.
Showing posts with label Vegan Friendly. Show all posts
Wednesday, February 8, 2012
Tuesday, January 17, 2012
Sweet Potato Hash
Posted by
Alexandra Rogers
Happy New Year, my friends! I am employed full-time back in NYC now, which means you can expect healthy, simple, inexpensive and fairly quick-to-prepare meals out of this blog (and quite a few more restaurant recommendations and write-ups). This sweet potato hash recipe, is one of my all-time favorites, a go to comfort food that's easy to make and easy to prepare ahead of time. In fact, if you have any cubed sweet potatoes left over from making your Superfood Soup, you can use them here.
The best thing about this dish is all the possible ways you can take it. This year, I've heard many of my colleagues (especially those my age) tell me that they wish they could cook, but they just don't know how. I think the key to confidence in the kitchen, to moving beyond heating water for spaghetti or mac & cheese, is learning basic recipes that you can slowly learn to modify. This sweet potato hash is a learn-to-cook dish if I've ever seen one. Once you get comfortable with the textures and timing of this recipe, feel free to chop other vegetables the same size and saute them along with everything else. Certain choices will probably fare better than others, so I've listed out some "possible add-ins" for you under the recipe. Another great thing about this recipe? It is vegan-friendly, and you can serve it for breakfast, lunch or dinner! Enjoy.
Sweet Potato Hash
By Alexandra Rogers
Ingredients
Olive oil
2 cups sweet potatoes, cut into roughly 1/4" cubes
2 cups zucchini or other summer squash, cut into roughly 1/4" cubes
2-3 teaspoons garlic, minced
1/4 cup pine nuts
Pinch of cumin (optional)
Pinch of cayenne pepper (optional)
Salt & Pepper
Recipe
Heat enough oil to coat the bottom of a large saute pan over medium-high heat. Once the oil is hot, add sweet potatoes. Cook the sweet potatoes for approximately 3 minutes. Add zucchini and cook for 5 minutes, stirring infrequently so the vegetables have the opportunity to caramelize a bit. At this point, the sweet potatoes should be almost tender--able to be pierced easily with a fork. Add the garlic, cumin, cayenne, salt, pepper and pine nuts and stir to combine. Cook for at least 3 minutes, until garlic softens and cooks a bit, and until potatoes are tender enough to eat. Serve hot. Makes 2 servings.
Possible Add-ins: Diced red onion (1 cup), red or orange bell peppers, other types of squash (e.g. patty pan)
Friday, December 30, 2011
Superfood Soup (Sweet Potatoes, Kale, Lentils)
Posted by
Alexandra Rogers
Although a warming soup made of super foods needs little excuse, here are mine: I have a cold right now. It's winter. Oh, and also, we just got done with Christmas and are heading into a time of year where New Year's Resolutions (and a gym membership for this girl) are looming.
Time for a super healthy soup.
This soup is incredible. The three main ingredients kale, sweet potatoes, and lentils are all considered "super foods."I just don't think you can go wrong here. Low in fat, high in everything good.
As an added bonus, this soup is fairly quick to prepare and incredibly simple. If you prep all the ingredients beforehand you really just have to throw things in and set a timer. Make sure to make enough for leftovers, as you'll definitely want them . The end result is garlicky, healing, and apparently--unlike most things I like when I'm sick--very, very good for you!
Red Lentil Soup with Sweet Potatoes and Kale
By Jen, from Eating Clean
Ingredients
1 tablespoon olive oil
1 medium white or yellow onion, chopped
2 cloves garlic, finely chopped
5 cups water
1 cup red lentils, rinsed and drained
2 teaspoons sea salt
1 1/2 teaspoons ground coriander
1 1/2 teaspoons bittersweet paprika
3/4 teaspoon ground cumin
12 ounces fresh sweet potatoes, peeled and cubed (2 cups)
4 cups chopped fresh kale leaves (stems removed)
Freshly ground black pepper
1 tablespoon olive oil
1 medium white or yellow onion, chopped
2 cloves garlic, finely chopped
5 cups water
1 cup red lentils, rinsed and drained
2 teaspoons sea salt
1 1/2 teaspoons ground coriander
1 1/2 teaspoons bittersweet paprika
3/4 teaspoon ground cumin
12 ounces fresh sweet potatoes, peeled and cubed (2 cups)
4 cups chopped fresh kale leaves (stems removed)
Freshly ground black pepper
Recipe
In a large pot or dutch oven, heat oil over medium heat. Add onions and cook for approximately 5 minutes. Next, add garlic, cooking for about 30 seconds and stirring to combine with onions. Add all spices and salt, stir to combine.
Next, add lentils and stir to coat with spices, onions and garlic. Pour in 5-7 cups of water (depending on how thick you like your soup--add less water for thicker soup). Bring to a boil, then reduce to a simmer and simmer, uncovered, for 10 minutes. Add sweet potatoes and simmer until tender, about 10-12 minutes, then add kale and simmer for about 5 minutes. Crack fresh black pepper lightly over the soup and serve hot.
Tuesday, September 20, 2011
Cremini Mushroom Strudel with Pesto
Posted by
Alexandra Rogers
Last week, there was a frost in Wisconsin. The next morning, I actually turned the heat on in my car. Maybe I'm a little bit of a wimp (it still got to 57 degrees that day), but all I wanted to do all day was curl up in a down comforter and eat something mushroom-based. Because, for some reason, mushrooms solve my cold weather blues.
So, after perusing the Internet for inspiration, I saw a recipe for a wild mushroom strudel accompanied by arugula pesto. I did not have a wide assortment of mushrooms on hand, nor did I have any arugula, so I improvised and ended up with my own original recipe.
First, I chopped fresh herbs (using fresh herbs in this is a must, which makes it an excellent dish to make in early fall/late summer, when fresh herbs are still available at markets and in gardens). I also chopped a whole bunch of cremini (or baby portabella) mushrooms. This is not a quick recipe, but you can make it a whole lot quicker by buying pre-chopped mushrooms. I usually frown on that, but this recipe is very good and ever so slightly too time consuming. So, you know, buy the pre-chopped mushrooms. I recognize that you have things on your to do list that trump making dinner, from time to time. Or, if you're really busy and still need mushroom-y goodness, make this very quick wild rice pilaf. I digress.
This strudel recipe is also an excellent opportunity to conquer a fairly straightforward ingredient that many home cooks fear: phyllo dough. You know what I'm talking about--you eat it whenever you go to your favorite Greek restaurant and dream about being able to recreate the spanakopita at home. Maybe even baklava (okay, even I'm afraid of that recipe). But that crispy, flaky dough seems like it would take hours to work with and would be quite finicky. As it turns out, phyllo dough is super easy to work with. Shh...let's keep it our little secret. For a video instruction of how to do it, view this handy video. My only note on phyllo dough is that if you buy it frozen (and I encourage you to do so), it has to thaw in the refrigerator overnight and on the counter for two hours after that. This is not a recipe to make on a whim. But, it is delicious and warming and somehow brings my two favorite seasons together; pesto tastes like summer, and mushrooms wrapped in delightful pastry taste like fall. This is the perfect September meal. Enjoy!
Cremini Mushroom Strudel with Pesto
By Alexandra Rogers
Ingredients
5 Tablespoons butter
1-2 Tablespoons extra virgin olive oil
2 large garlic cloves, minced
1/4 cup shallots, diced
1 Tablespoon fresh basil, minced
3 teaspoons fresh thyme, minced
1 teaspoon fresh rosemary, minced
24 oz. cremini mushrooms, sliced
6 sheets of phyllo pastry (fresh phyllo pastry or frozen thawed)
Recipe
If using frozen thawed phyllo pastry, you must place the frozen pastry in the fridge overnight, and remove the pastry from the fridge 2 hours before use on the day of. So, by the time you start the rest of this recipe, the phyllo dough needs to be sitting on the counter!
In a large skillet, melt 2 Tablespoons of butter over medium heat. Once the pan is hot and the butter is melted, add shallots, garlic, basil, rosemary and 2 teaspoons thyme. Let cook for 2 minutes, stirring once or twice.
Add mushrooms (the pan will seem far too crowded, but just go with it). Saute for 15 minutes, stirring occasionally, until very tender.
Remove the mushrooms from heat, and set aside to cool. Salt to taste (I used less than half a teaspoon).
Preheat the oven to 400 degrees Fahrenheit. Lightly grease a small baking sheet.
Melt 3 Tablespoons butter in the microwave (this should take a little less than 30 seconds).
Place kitchen towel on work surface and top with 1 phyllo sheet. Brush that sheet with melted butter and sprinkle with 1/2 teaspoon thyme. Top that phyllo sheet with another phyllo sheet, brush with butter and sprinkle with another 1/2 teaspoon thyme. Repeat until the phyllo dough is 6 sheets high. You can find a bit more guidance on how to work with phyllo dough here.
Spoon mushroom mixture into the middle of the phyllo dough street. Fold the longer sides over the mushroom mixture (almost like you're wrapping a present), and then roll up the dough, jelly roll style. Roll as evenly as you can, and when complete, place the roll seam down on the greased baking sheet.
Brush the top and sides of the roll with butter and sprinkle with any remaining thyme. Put the roll in your preheated oven and bake for 15-20 minutes, until golden brown all around (including the middle of the strudel).
Let cool for 3-4 minutes, then slice with a serrated knife to serve. Garnish with fresh pesto (I used 1-2 Tablespoons/slice) and serve. Serves 4.
Thursday, September 8, 2011
Garden Fresh Spaghetti
Posted by
Alexandra Rogers
During a recent visit to the bookstore, I picked up Alone in the Kitchen with an Eggplant. The book features a collection of short essays (which end with recipes) about cooking and eating alone.
One of the first essays I read in the book was by Amanda Hesser. She talked through the meal she made herself one night when her significant other was out of the house. She made a beautiful point about the fact that we often don't cook well for ourselves when we cook only for ourselves. I've definitely gotten home to an empty house and thrown a microwave dinner in more times than I can count. And that's a little funny, if you think about it, since I am obsessed with food and cooking.
Hesser made a point that cooking a great meal for just you is a way of respecting yourself. I like this logic a lot, and so today I'm offering up a recipe that is meant only for one person (though obviously you can double it if you like) and that capitalizes on the best your garden or green market currently has to offer.
My mother taught me this combination after plucking fresh tomatoes and basil from her garden one day this summer, and mincing some garlic she'd picked up from the green market earlier that day. It is the epitome of fresh comfort food. (Note, do remove the skins from the tomatoes--it's a neat trick to learn, especially because skinless tomatoes produce a sweeter sauce, with no bitter taste coming in from the skins.)
Garden Fresh Spaghetti
By Alexandra Rogers
Ingredients
2 Tablespoons extra virgin olive oil
4 plum or roma tomatoes, skins removed
3-4 cloves of garlic, minced
1/3 cup roughly minced basil
1 serving of your favorite type of spaghetti noodle (usually 1/8 the box)
salt to taste
grated parmesan cheese (optional)
Recipe
Bring water to boil in a medium pot. Once water is boiling, add in spaghetti and cook for several minutes, until it has reached your desired consistency. Pour pasta into a colander to drain the water and set aside.
Roughly dice the skinless tomatoes.
Heat extra virgin olive oil in a medium chef's pan, over medium/medium-high heat. Once the oil is hot, add minced garlic and cook for 2 minutes. Then, add the diced tomatoes and stir to combine. Cook tomatoes and garlic together for about 3 minutes. Add the cooked spaghetti noodles (I used capellini) and stir to coat pasta in tomato sauce. Add minced basil and salt to taste. If using parmesan, add before serving.
Serves 1.
Sunday, August 28, 2011
Pesto
Posted by
Alexandra Rogers
If there is ever a time to make fresh pesto, it's now. Fresh basil is abundant at green markets and grocery stores everywhere, and better yet--it's cheap. Fresh pesto simply screams summer to me. Plus, it's very easy (and quick) to make, and it's one of those dishes that's sure to impress just about anybody you serve it to. Confession: I get pretty impressed with myself every time I make it.
Okay, so here's what you do. Go get yourself some basil. Grab some from your garden, green market or grocery store. You're going to need a lot of it. Note: pesto (without cheese) freezes well. If you'd like to freeze your pesto for use later in the year, simply blanch the basil leaves before putting them in the food processor, continue with the recipe and freeze the finished product in jars).
Grate some parmesan cheese--you'll need it a bit later in the recipe. Toast some pine nuts. During this step, resist all urges to turn your back. You will burn the pine nuts if you don't give them your full attention. While you work, sing along to your favorite music and think about how much you love summer.
The next step is very easy. Throw everything except the cheese into the food processor. Combine it well. Then toss it with some pasta (I like it best with Penne noodles), cheese and vegetables. Or freeze it. Or use it on a salad. Most of all, enjoy this pesto along with the last, ever so sweet, days of summer.
Pesto
Adapted by Alexandra Rogers, from Mark Bittman
Ingredients
4 cups basil leaves, washed and dried4 medium cloves of garlic
4 Tablespoons toasted pine nuts
1/2 cup extra virgin olive oil
3/4 teaspoon salt
1 1/2 cups of parmesan
Recipe
In a food processor fitted with the blade attachment, combine basil, garlic and pine nuts. Scrape sides of the food processor with a rubber scraper and make sure ingredients are well combined and chopped. Add the olive oil slowly with food processor running.
It's likely you won't use the full 1/2 cup of olive oil, so add enough to get the pesto to a consistency that is looser than paste but not overly oily. I usually use about 1/4 cup + 2 Tablespoons olive oil in total.
Turn off the food processor and dip a spoon into the pesto. Now, taste the pesto! It will taste like it needs salt. At this point, add a sprinkling of salt (far less than a teaspoon) and combine. This is the "salt to taste" step that can be somewhat confusing. When making pesto, be sure to under salt a bit since you'll be adding salty cheese later in the dish that will carry those flavors through all the way.
Once salt is added, your pesto is ready to use. Toss with a pasta of your choice and add the parmesan cheese until thoroughly combined and serve. This makes enough pesto to cover 4-5 cups of pasta.
You can also use the pesto as part of salad dressings or over vegetables. More specific serving suggestions will be coming your way soon!
Monday, July 25, 2011
Quick Mango Salsa
Posted by
Alexandra Rogers
People, it is hot in New York City. Waiting for the train is a sweatier affair than usual, and it takes all of two seconds of outdoor time to rid your whole body of a day spent in air conditioning. On Friday, the heat index didn't dip below 100 degrees fahrenheit until after 10pm.
The stifling heat in New York City is relevant because I was going to post a baking related recipe. But, quite frankly, I think it's unwise to heat up an oven right now.
So instead, I give you the easiest mango salsa ever. No heat required. Barely any sweat required. Just chop some things up and put them in a bowl! Mix them together and you've got a fancy and gourmet-seeming garnish for just about anything. I like to serve it along side baked or sauteed white fish (like tilapia or halibut). It's good on blue corn chips, too. And, I won't lie, I've had multiple dinner guests finish it out of the bowl with a spoon. That is never a bad sign. Happy summer, and good luck surviving the heat wave!
Ingredients:
1 mango, diced into 1/4" cubes
1/2 small red onion diced small
2 Tbs cilantro, minced
1/4 tsp chile powder
Juice of one small lime
Recipe:
Combine mango, red onion, cilantro and chile powder (to taste). Sprinkle lime juice over and combine well with hands or two spoons.
Makes 4-6 servings.
The stifling heat in New York City is relevant because I was going to post a baking related recipe. But, quite frankly, I think it's unwise to heat up an oven right now.
So instead, I give you the easiest mango salsa ever. No heat required. Barely any sweat required. Just chop some things up and put them in a bowl! Mix them together and you've got a fancy and gourmet-seeming garnish for just about anything. I like to serve it along side baked or sauteed white fish (like tilapia or halibut). It's good on blue corn chips, too. And, I won't lie, I've had multiple dinner guests finish it out of the bowl with a spoon. That is never a bad sign. Happy summer, and good luck surviving the heat wave!
Ingredients:
1 mango, diced into 1/4" cubes
1/2 small red onion diced small
2 Tbs cilantro, minced
1/4 tsp chile powder
Juice of one small lime
Recipe:
Combine mango, red onion, cilantro and chile powder (to taste). Sprinkle lime juice over and combine well with hands or two spoons.
Makes 4-6 servings.
Saturday, July 16, 2011
Moroccan Couscous
Posted by
Alexandra Rogers
Most college kids eat spaghettio's, mac and cheese and chinese take-out. While those were all star players in my college diet as well, boxed couscous was my go-to meal. Now, I've got nothing against the Near East Couscous that used to line my shelves in college--I ate it at least three times a week for dinner (paired with a vegetable when I was feeling responsible)--but boxed meals tend to be high in sodium.
Once I discovered how super easy and delicious it is to make couscous from just the grain itself and some oil and spices well...there was no turning back. This recipe is a great introduction to the technique. Make it a few times and you should be able to improvise from there, by changing up the spices or what you mix into the cooked couscous. Enjoy!
Moroccan Couscous
Adapted by Alexandra Rogers, from Moroccan Couscous-stuffed Chicken Breasts by Alison Attenborough, published on Food & Wine
Ingredients
2 Tablespoons oil
1 dash of cinnamon
1 teaspoon coriander
1 teaspoon cumin
2/3 cups plain couscous
1 cup vegetable stock
6-8 small dried apricots (use unsweetened, natural), cut into small, rough pieces
3/4 cup pine nuts, toasted
2 Tablespoons fresh parsley, chopped
Recipe
1. Bring vegetable stock to a light boil in a small pot.
2. Heat oil over medium-high in a medium-sized pot. Add cinnamon, coriander and cumin and let cook for one minute.
3. Remove the medium pot from heat and add couscous. Stir the couscous until thoroughly coated with the oil and spice mixture, then pour the boiling vegetable stock over the couscous, cover tightly and set aside for 5 minutes.
4. Prepare parsley, pine nuts and dried apricots. When the couscous has absorbed all the liquid, stir parsley, pine nuts and dried apricots in and serve. Serves 4.
Once I discovered how super easy and delicious it is to make couscous from just the grain itself and some oil and spices well...there was no turning back. This recipe is a great introduction to the technique. Make it a few times and you should be able to improvise from there, by changing up the spices or what you mix into the cooked couscous. Enjoy!
Moroccan Couscous
Adapted by Alexandra Rogers, from Moroccan Couscous-stuffed Chicken Breasts by Alison Attenborough, published on Food & Wine
Ingredients
2 Tablespoons oil
1 dash of cinnamon
1 teaspoon coriander
1 teaspoon cumin
2/3 cups plain couscous
1 cup vegetable stock
6-8 small dried apricots (use unsweetened, natural), cut into small, rough pieces
3/4 cup pine nuts, toasted
2 Tablespoons fresh parsley, chopped
Recipe
1. Bring vegetable stock to a light boil in a small pot.
2. Heat oil over medium-high in a medium-sized pot. Add cinnamon, coriander and cumin and let cook for one minute.
3. Remove the medium pot from heat and add couscous. Stir the couscous until thoroughly coated with the oil and spice mixture, then pour the boiling vegetable stock over the couscous, cover tightly and set aside for 5 minutes.
4. Prepare parsley, pine nuts and dried apricots. When the couscous has absorbed all the liquid, stir parsley, pine nuts and dried apricots in and serve. Serves 4.
Saturday, June 11, 2011
Spicy Orzo-Stuffed Peppers
Posted by
Alexandra Rogers
Shockingly enough, I have yet to share with you my biggest secret to eating well on a busy schedule. Here it is: spend a weekend day cooking. Or even a weekend evening. If you spend a few hours prepping certain ingredients you can guarantee a tasty and healthy series of meals for the week ahead--even if the week ahead is a crazy one. These stuffed peppers are a great intro to that technique.
It's a soothing and fun dish to cook, too. You get to work with crisp bell peppers and fill them with a homemade pasta dish. Not to mention, the end result is spectacular. Think about pulling this out of the oven on a Tuesday night. Enticing, isn't it?
Spicy Orzo-Stuffed PeppersAdapted from Miranda Agee @Haute Headquarters, by Alexandra Rogers
Ingredients
2-3 Tablespoons oil (whichever kind you like, just not e.v.o.o.)--enough to coat a large pan
1 medium red onion, diced
2 small zucchini, diced
1 (28 oz) can of diced tomatoes
2 teaspoons red pepper flakes
2 cloves of garlic, minced
1 cup orzo
6 small bell peppers, any color you like
1 cup vegetable broth
2 Tablespoons minced/torn basil
1/4 cup bread crumbs
1/2 cup parmesan cheese, freshly grated
2 Tablespoons extra-virgin olive oil
Recipe
1. Preheat oven to 425 degrees fahrenheit.
2. Pour vegetable broth into a pan that will fit all of your peppers, standing up, with room between them. Usually a cake pan works for this.
3. Wash your peppers and cut off the stem, discard the seeds, etc.--basically get them ready to be stuffed. Lightly salt & pepper the bell peppers and set them aside.
4. Combine bread crumbs, parmesan cheese and basil in a small bowl and set aside.
5. Place a large saute pan on medium-high heat. Once the pan is hot, add enough oil to coat the pan and toss in onions. The onions should sizzle a bit as they hit the pan. Cook the onions for 2-3 minutes until they are translucent. Once onions are translucent, add the zucchini (this should come out to about 3 cups of zucchini.) Give the whole mixture a stir or two and let cook for 5 minutes, until zucchini has shrunk down and the mixture is beginning to caramelize and brown. Do not stir frequently, as this will disrupt the caramelization process. Add garlic and red pepper flakes and cook for another 2 minutes. Throughout the process, salt and pepper each layer lightly.
6. Pour the entire can of diced tomatoes and juices into the pan and thoroughly combine with the zucchini and onions. Bring the mixture in the pan to a simmer, over medium-high heat and cook for 8-10 minutes or until the mixture has reduced and is no longer soupy. (You'll know it is ready when you move some of the mixture aside with a spoon and no liquid comes rushing in to fill the void.)
7. While your tomato mixture is simmering away, bring water to boil in a small pot. Cook the orzo for no more than 2 1/2 minutes. The orzo should be undercooked, since it will cook more while it bakes inside of the pepper. Once your orzo is drained, set that aside.
8. When the tomato mixture is ready, add orzo into the pan. Stir to combine, and add salt and pepper to taste. Your filling is now ready!
9. Fill each pepper to the brim with filling, then top off with a heart handful of the breadcrumb/parmesan/basil topping. Place the peppers in the pan with vegetable stock on the bottom and cover the entire thing securely in aluminum foil. This step is very important, because without it you'll have dishearteningly crisp peppers at the end of the cooking time.
10. Bake for 45 minutes without opening the oven. The peppers should be tender and pierced easily with a fork. Serves approximately 6, depending on the size of the bell peppers.
Thursday, May 19, 2011
Tofu & Glass Noodle Stir Fry
Posted by
Alexandra Rogers
I was nine years old when my family moved to Verona, WI (near Madison, WI). On our first visit to my elementary school we met another family who had just moved to the area from England. My mother became close friends with the mother from the other family, Harwinder, in mere moments. Ever since, they've been more than family friends. To me, they are simply family.
You're probably wondering what this has to do with the mung bean noodles pictured above, right? I'm getting to it. Harwinder grew up in Malaysia and she makes, without exception, the best Indian, Malaysian, and Chinese food I have ever eaten. In my entire life. This woman is a talented, talented cook.
Since I walked home from school with her kids and hung out at their house "doing homework" after school (read: giggling about boys with their middle daughter, listening to English pop music and making a life-long friend), I often invited myself got invited to stay for dinner. I'm no fool. I knew even then that I was in the presence of culinary talent. I was also a vegetarian. Which (finally) brings me to my main point. This dish is based off of something Harwinder made for me a lot. It's vegetarian--vegan, in fact--and, to boot it can be made gluten free if you use La Choy brand soy sauce (I picked up this weird little factoid from working at a sushi restaurant in NYC). Plus, most importantly, it tastes really good.
Tofu & Glass Noodle Stir FryBy Alexandra Rogers, Inspired by Harwinder Dowd
Ingredients
Marinade + Tofu
1 (10 oz) block of high protein tofu, super firm
1/3 cup low sodium soy sauce
1/3 cup water
4 teaspoons chili garlic sauce
Stir Fry
4 bundles of cellophane noodles (you can find them in the Asian food aisle of most large grocery stores)
3 Tablespoons oil (I used sunflower oil, but you can use whatever you like)
4-5 medium cloves of garlic, minced
1 (8 oz) bag of snow peas
3/4 cup bean sprouts
1 Bok Choy
Recipe
Marinade + Tofu
1.Chop tofu into squares that are 1/4" thick and 1" wide and long.
2. In a tupperware container combine soy sauce, water and chili garlic sauce. Add tofu and shake to coat evenly.
3. Marinate for at least 20 minutes. Overnight in the fridge is fine as well.
*BEFORE YOU BEGIN-I own a very large saute pan and I still had to make this recipe in two batches. This means you might want to prep everything you have but only make a 1/2 recipe at a time, so as not to overcrowd the pan and stop it from cooking properly. Please let me know if you have any questions about this.*
Stir Fry
1. wash and dry the bok choy. Separate the leaves from each other. Then, with a knife, separate the leafy, green part of the bok choy from the firm, white part. Chop the bok choy leaves into approximately 1" pieces and slice the stems into 1/2" pieces (like you would slice a carrot). Set aside.
2. Fill a medium pot with water and bring to a boil. When water is boiling rapidly (in other words, the bubbles are large and popping up fiercely) add the mung bean noodles. You might have to use a wooden spoon to shove them in as they are rather stiff and oddly shaped. Once the noodles are in, cook for only three minutes, then drain and set aside. The noodles should be white and semi-translucent.
3. Coat the largest pan you have with the oil of your choice and bring to medium-high heat. Once the pan is hot, add garlic--you should hear it sizzle. Let garlic cook for 1-2 minutes, stirring frequently.
4. Add bok choy stems and cook for two minutes.
5. Add snow peas and marinated tofu, reserving the marinade.
6. Add bean sprouts and cook for 2-3 minutes.
7. Add mung bean noodles and pour the marinade over the mixture in the pan.
8. Continue to cook over medium-high heat using two wooden spoons to stir the mixture and break up the noodles.
9. Once the noodles have absorbed the sauce and just as things begin to get a little sticky in the pan, pull the pan off of the heat and serve. Makes approximately 10 servings.
Wednesday, April 27, 2011
Quinoa Pilaf from Eat Tweet!
Posted by
Alexandra Rogers
Here's the recipe for today:
Quinoa Pilaf
Brwn1/3c onion&carrot/T buttr&oil; +t garlic/1/2t s+p&turmeric/c quinoa 2 m. Boil + 2c h2o. Cvr,simmr15m.Fluff+2T cilantro&mint.
That, my friends, is a twitter recipe. Maureen Evans (@cookbook) has published Eat Tweet, a twitter cookbook. Over 1,000 recipes are written in 140 characters or less. Of course, it does take a bit of decoding.
When I heard about this book, I was incredibly excited to check out a combination of a fairly new technology and a cookbook! I bought it as sort of a novelty and didn't expect a whole hell of a lot from a recipe that took less space to communicate than a summary news lead. But I was pleasantly surprised. This quinoa pilaf is the first thing I've made from the book and it is seriously delicious. I've written the recipe in my usual format, with my own adaptations below. Besides making a delicious dinner, this is a one pot meal. And, you know how I love a one pot meal.
Quinoa Pilaf
Adapted from Eat Tweet by Alexandra Rogers
Ingredients
2 Tablespoons Sunflower Oil (or vegetable oil, or a combination of butter and olive oil)
1/3 c. onion, medium diced
2/3 cup carrots, sliced into 1/2" thin pieces
1 teaspoon freshly minced garlic
1/2 teaspoon salt
1/2 teaspoon pepper
1 teaspoon turmeric
1 cup quinoa*
2 cups water
2 Tablespoons fresh mint, minced
2 Tablespoons fresh cilantro, minced
Recipe
Heat oil in a medium saucepan. Once the oil is hot (it should sizzle when a drop of water touches the pan--it is too hot if a drop of water causes the oil to pop)--add the onions and carrots. Let cook, stirring only once or twice, until the onions are tender and slightly brown (about 5-6 minutes). Add garlic, salt, pepper, turmeric and quinoa and let cook for two minutes, stirring only enough to coat the quinoa with the mixture in the pot. Add 2 cups water and bring to a boil. Once boiling, bring down to a simmer and simmer, covered, for 15 minutes or until water is fully absorbed. Add mint and cilantro, fluff with a fork and serve. Serves 4.
*Quinoa is a slightly nutty tasting grain that is gluten-free and good for you! It can often be found in the health food aisle at your grocery store.
Tuesday, March 22, 2011
Mixed Greens Salad with Apples, Grapes, Bleu Cheese and Candied Pecans
Posted by
Alexandra Rogers
I must admit, I have never been a salad person. I didn't eat them growing up. I didn't eat them in college, when my more conscientious female friends chose them for lunch over say, a burger and fries. It wasn't because I had something against healthy food. It's just...well...up until I was about 21, I had never met a salad whose butt I could not kick. In the culinary sense. (Excuse the language.)

Mixed Greens Salad with Apple, Grapes, Bleu Cheese and Candied Pecans
By Alexandra Rogers
Ingredients
Salad
1 bag of mixed greens (I prefer the baby spring mix), washed and dried
1 cup of red grapes, washed
2 fuji apples, cut into 1/2"-1" cubes
3/4 cup bleu cheese crumbles (a 4 oz. package gives you a little less, but that'll be more than enough)
1 cup Candied Pecans
Apple Cider Vinaigrette
1/4 cup Apple Cider Vinegar
1/4 cup + 2 Tablespoons Tablespoons Olive Oil
1 teaspoon mustard (the good, grainy stuff is best)
a dash of salt
a dash of pepper
Recipe
In a large bowl, mix grapes, cubed apples, bleu cheese crumbles and mixed greens together.
In a small Tupperware container or lidded jar, mix vinaigrette ingredients together. Make a "lazy man's emulsion" by covering the container and shaking vigorously until combined.
Toss the salad with just enough of the vinaigrette to lightly coat. Add candied pecans and mix. You will probably have some vinaigrette left over. Serve immediately. Serves 5-6
*As a side note, the ingredients keep fairly well for a few days (the apples brown unless you spritz them with lemon juice when you cut them), but if you're making it on a Sunday and having it for lunch on Monday, then don't put the dressing or candied pecans on until the day you're eating it.
Monday, March 14, 2011
Bell Pepper & Basil "Stir Fry"
Posted by
Alexandra Rogers
For many people, Mondays are insane. When you finally head home, after a barrage of emails and voice mails and meetings, nothing sounds better than a warm meal. And, for a lot of people (even people like me, who love to cook), making dinner seems like a lot more energy than it is worth. This stir fry, however, is easy. Seriously, really easy.
And, in honor of national nutrition month, it is a colorful and healthy meal as well. Bell peppers, basil and a (reasonable size portion of) brown rice. To prepare myself for Monday nights, I usually do the prep work on Saturday or Sunday so all that is left to do is throw things in a pan and eat the delicious results. And, you know what happens to be a great thing to munch on while you're waiting for this to cook? Sweet potato wedges, of course.
Pepper & Basil "Stir Fry"
By Alexandra RogersIngredients
1 cup brown rice, cooked
2 Tablespoons coconut oil
2-3 red, yellow or orange bell peppers, julienne
1/2 large Red onion, sliced into half rounds
1/3 cup fresh basil leaves, torn
3 medium garlic cloves, minced
1 inch piece of fresh ginger root, grated
2 Tablespoons rice wine vinegar
3 Tablespoons soy sauce
Recipe
In a large pan, heat coconut oil over medium-high heat. Add onions, separating into separate pieces, and stir once to coat with oil. Cook for 5-7 minutes, until onions have begin to caramelize and become tender. Do not stir often, as this interrupts the caramelization process.
Add peppers and cook for 3-5 minutes, until peppers are slightly tender and browned in spots.
Add garlic and ginger to the pan, stir thoroughly, and cook for 2-3 minutes. Add soy sauce and rice wine vinegar and cook for 2 minutes.
Lastly, add the fresh, torn basil leaves and cook for about 3-4 minutes, until basil is wilted and sticking to peppers and onions.
Serves 3. Serve warm, accompanied by 1/3 cup rice.
Friday, March 11, 2011
Sweet Potato Wedges
Posted by
Alexandra Rogers
I have had an addiction to sweet potatoes since I was about 8 years old. I was a vegetarian then, and thanksgiving generally consisted of green bean casserole, a biscuit and these lovely boiled (and drenched in brown sugar) sweet potatoes my grandma always made. That was, and still is, a delicious way to prepare sweet potatoes, but in the interest of healthy and colorful food, I decided to share a recipe that lets the sweet potato speak for itself and does not cancel out its many health properties.
Sweet potatoes are low in sodium and very low in saturated fat and cholesterol. They are a good source o Dietary Fiber and several other vitamins. Like kale, sweet potatoes are anti-inflammatory, making this snack especially good for you after a workout. Plus, they taste great and it seems like a thoughtful appetizer before serving a stir fry or a burger or, just about anything!
Sweet Potato Wedges
By Alexandra Rogers
Ingredients
2 Sweet Potatoes/Yams, sliced into wedges
1-2 Tablespoons olive oil
1 teaspoon ground cumin
heavy pinch of salt
Recipe
Preheat oven to 500 degrees Fahrenheit. In a tall-sided baking pan or sheet, place sweet potato wedges. Sprinkle lightly with olive oil, cumin and salt. Cook for 15 minutes, then shake the pan to flip the wedges. Cook for another 10-15 minutes. Serve with soy sauce and chopped scallions.
Subscribe to:
Posts (Atom)