Showing posts with label Sweet. Show all posts

Tuesday, August 23, 2011

Cocoa Brownies with Peanut Butter Frosting

My mother is the baker, and I am the cook. That has always been the case in our family. My mother is analytical and scientific in her reasoning, and therefore excellent at measuring with care and substituting ingredients and amounts appropriately. 
    
I'm  more of a creative type when it comes to the kitchen. I create as I go, and very rarely follow a recipe to the dot. Part of my fondness for cooking is the ability to change a dish as I see fit, at any point during its creation. I get frustrated by the patience required by baking, the waiting game and inability to change a recipe once it goes in the oven. The point is, I am not really a baker at heart. This is, I understand, a very odd proclamation to make in the middle of a brownie recipe. Hear me out. 
           
I bake as therapy. You see, I can make a stir fry without much thought at all. But Cocoa Brownies with Peanut Butter Frosting? Those require some concentration. And sometimes, in the midst of a particularly bad week, I need to bake. Because when I bake, my mind refuses to wander. I concentrate only on the task at hand.
     
I know, as a frequent multi-tasker, that I don't need to focus all of my attention on leveling off a cup of sugar with the back of a knife. But, somehow, that's just what happens. 
     
Everything else melts away as I bake, using techniques my mother has taught me over a lifetime.
It's quite hard to feel that anything is amis in the world when you watch peanut butter and butter being  whipped together into a light and fluffy frosting. And if that doesn't do it, sampling peanut butter frosting can make just about anybody smile. (Except a person with peanut allergies. Obviously).

The very act of creating a batter, pouring it into a pan and waiting every so patiently for the result is becoming  slightly more appealing to me. Here's why: earlier this evening I stared at an empty 8" x 8" square pan, and now it's filled with delightful, soul-healing, smile-creating brownies. That is quite an accomplishment, if you really think about it. 

I must use this last paragraph to tell you about the brownies themselves and not just about me. Salty. Sweet. Delightful. I should not have waited to make them for nearly four months.  (I've been waiting since May to make this particular recipe, ever since I saw it on Not Without Salt.) It's no surprise I love them, based on my ongoing (and I might add, very justified) love affair with the chocolate and peanut butter combination (as seen here and here). 
Cocoa Brownies with Peanut Butter Frosting
Adapted by Ashely from Not Without Salt, from Alice Medrich


Ingredients
Cocoa Brownies
1 1/4 stick (10 Tablespoons) unsalted butter
1 cup sugar
3/4 cup plus 2 Tablespoons unsweetened cocoa powder
1/4 teaspoon salt
2 large, cold eggs
1/2 teaspoon vanilla extract
 1/2 cup all-purpose flour


Peanut Butter Frosting
3/4 stick (6 Tablespoons) softened butter
3/4 cup creamy peanut butter
1 cup powdered sugar
pinch salt


Recipe
Cocoa Brownies
Preheat the oven to 325 degrees Fahrenheit and grease an 8" x 8" square pan.


First, put a medium/large pot with a few inches of water on the stove and turn on the heat (to medium) to bring to a simmer. Be sure a bowl can fit inside of it, with room to stir ingredients, and without touching the simmering water. This is basically a makeshift double boiler. It should look a little like this:

Now that you know that bowl fits in the pot the correct way, take it out and put the following ingredients in it: Sugar, Cocoa Powder, Salt. Mix those ingredients together well, with a fork or a whisk. Then, cut the butter into 1 Tablespoon pieces. The idea here is to get them small enough to melt rather quickly (quicker than if you just threw the whole block of butter in there). 


Place the bowl with the cocoa mixture over the simmering water and stir occasionally with a wooden spoon. Once the butter is almost melted (you should see only 3-4 small pats of butter left in the mixture), remove the bowl from the pot (with oven mits on) and let the mixture cool to warm. The residual heat will melt the rest of the butter. 


Once the mixture is no longer hot, add cold eggs one at a time. If you haven't allowed the cocoa mixture to cool, you will make scrambled, chocolate eggs (accidentally). Stir the eggs into the mixture with a wooden spoon, then add the vanilla extract. Once all of this is well combined, add the flour. Once the flour is integrated into the cocoa mixture (read: you can no longer see any flour), stir the mixture 40 times. 


Pour the batter into the pan, spread evenly and bake for 25-28 minutes, until a toothpick or knife inserted into the center comes out nearly clean. Leave to cool on a wire rack.


Peanut Butter Frosting
In an electronic mixer fitted with the whisk attachment, cream together the butter and peanut butter. Then, incorporate the powdered sugar (I like to add 1/4 cup at a time). 


Frost the brownies once they are room temperature. Sprinkle very lightly with a pinch of kosher salt. Enjoy. Serves 16 brownies.

Sunday, July 3, 2011

Blueberries with Cinnamon and Maple Whipped Cream

As the Fourth of July fast approaches, I keep flashing back to childhood memories of fruit-based desserts. When I was a kid, my aunts would bake up tarts and cakes using blueberries, strawberries and raspberries to celebrate Independence day. We'd eat these delicacies on paper plates with plastic forks, sitting flat on the driveway in summer dresses, waiting until the moment we could light off fireworks and play with sparklers. Because of that history, something about this light dish screams Independence day and hot July days to me. To my lovely and inspiring cousin Nilmini, happy happy birthday. And to everybody else in the U.S.A., Happy Independence Day! Enjoy the fireworks.
Blueberries with Cinnamon and Maple Whipped Cream
By Institute of Culinary Education, adapted by Alexandra Rogers


Ingredients
1 c. heavy whipping cream
5 Tbs maple syrup
2 cups fresh blueberries, washed and picked over
Cinnamon


Recipe
Wash 2 cups fresh blueberries and be sure to pick out any sour-looking, wrinkled or bright purple/pink blueberries.  Lay the blueberries on a single later on paper towel so they dry.


Divide the blueberries between 4 wine glasses, placing about 1/2 cup blueberries in each glass. (Other glass containers work for this as well--but only use a container that can hold at least 1 cup). 


In a medium bowl, beat heavy whipping cream until soft peaks form (see an example of soft peaks, here). Once soft peaks firm, add the maple syrup and beat until heavy whipping cream forms stiff peaks--or, basically, until it looks like real whipped cream. 


Top each serving of blueberries with a light dust of cinnamon, then 2 spoonfuls of Maple whipped cream. Add one more light dusting of cinnamon atop the maple whipped cream and serve, immediately. 


There will be extra maple whipped cream--I like to set it out in a bowl, alongside a jar of cinnamon, and let guests adjust for themselves. Serves about 4.

Thursday, June 23, 2011

Banana Pudding with Nilla Wafers

The first time I ate this banana pudding, I ended up about an hour into the wrong part of Brooklyn. I was so focused on the pudding that I didn't notice when the train I was on went over the East River instead of under it, or when I missed the last stop where I possibly could have transfered to a train traveling the right direction. That's how good this pudding is. (Let's leave aside the fact that I have no sense of direction). 
The fateful day when I was introduced to this pudding was also my first day of work ever in NYC. Now, again, I work quite nearby the source of this delightful pudding (Magnolia Bakery). I think about it all the time. Sometimes I wish I could just eat this for lunch. And dinner. And breakfast. And, of course dessert. Really, it's that good. You have to try it. And then, if you're in NYC, you need to go to Magnolia Bakery and try it. (Plus, you'll look less like a tourist if you aren't in line for the cupcakes only...)
Banana Pudding with Nilla Wafers
From the Buttercup Bake Shop Cookbook
By Jennifer Appel of Magnolia Bakery and Buttercup Bake Shop, Adapted slightly by Alexandra Rogers


Ingredients


1 1/2 cups cold water
1 (14-ounce) can sweetened condensed milk
2/3 cup instant vanilla pudding powder
3 cups heavy cream
1 box Nilla wafers
6-8 medium bananas, peeled and sliced
8 16 oz. cups

Recipe
On the low speed of an electric mixer, blend the water, milk and pudding powder until thoroughly mixed, about 1 minute. Refrigerate for at least 4 hours (or overnight) until firm.
Blend water, sweetened condensed milk and pudding powder together until mixed thoroughly, on the low speed of an electric mixer (about 1 minute). Refrigerate the pudding mixture for at least 4 hours, until firm. If you like, this can be left overnight.
In a separate bowl, preferably another electric mixer bowl, whip the heavy cream until soft peaks form (about 6-7 minutes). Soft peaks have formed when you remove the beaters from the bowl and the mixture forms little peaks at the end of the beaters, but soft, wilting little peaks. (See image from fitsugar, below, for guidance).
Gently fold the pudding mixture into the whipped cream until well incorporated. I like to use a rubber scraper and try to incorporate as much air into the bowl as I can while I mix. 
In a large bowl, or (as I prefer) several small glasses, layer nilla wafers, pudding mixture and bananas. Layer until cups are full and pudding is gone and decorate with crushed nilla wafers on top. Refrigerate for about 60 minutes before serving. Serves 7-8.

Saturday, June 18, 2011

Blueberry Upside-Down Cake

Although the weather has been swinging between rainy and grey and sunny and super hot here in NYC,   it feels--officially--like summer. And, as I might have mentioned before, I truly believe that upside down cakes are an official summer dessert.
This blueberry upside down cake is a Martha Stewart recipe (that version is a bit fussier than mine), though it was originally introduced to me by my boyfriend's mother (she also introduced me to that ever famous, well-loved goat cheese and prosciutto strata). She brought this blueberry upside down cake out for dessert one night when we were all gathered around an outdoor table, finishing a perfect grilled summer meal and overlooking a prairie. It was a picturesque summer night--one of those evenings where there's a slight breeze and everyone at the table is newly tan and happily exhausted from a day in the sun. Trust me when I say: next time you have a summer evening--you should really pair it with this blueberry upside-down cake. You should also throw some vanilla ice cream in the bowl. Here's wishing you one of those unforgettable summer nights soon...happy cooking!
Blueberry Upside-Down Cake
Adapted from Martha Stewart by Alexandra Rogers


Ingredients
4 Tablespoons butter, melted plus a little extra to grease the pan
1/3 cup + 3 Tablespoons light-brown sugar
1 1/2 cups blueberries, washed 
3/4 cup all purpose flour
1 teaspoon baking powder
1/4 teaspoon salt
1 large egg
1/4 cup milk, room temperature


Recipe
1. Heat oven to 350 degrees Fahrenheit and grease a bread loaf pan. Pour 2 Tablespoons of the melted butter into the bottom of the pan and evenly coat by tilting the pan in every direction.
2. Sprinkle 3 Tablespoons of brown sugar over the butter, on the bottom of the pan.
3. Pour 1 cup of blueberries over the loaf pan and set aside.
4. In a large bowl, mix flour, baking powder and salt. I find it's best to use a whisk to get some air into the mixture. 
5. In another bowl, place 2 Tablespoons of remaining butter and 1/3 cup brown sugar and the egg and milk, and beat together with a fork.
6. Add wet ingredients to dry ingredients. Mix until just combined. Do not over mix. 
7. Pour half the batter into the loaf pan. Sprinkle 1/2 cup blueberries over the batter and spread the remaining batter on top of that.
8. Bake for 35-40 minutes, until a knife inserted in the center of the cake comes out clean (without any doughy batter stuck to it).
9. Serve with vanilla ice cream, to up to 8-10 friends and enjoy outside on a summer evening.

Wednesday, June 8, 2011

(Belated) Muesday

I know, I know, "Muesday Wednesday" doesn't work nearly as well as Muesday Tuesday. What can I say? I got a little busy. It happens to us all sometimes. That's why today's inspiration is this: restful cupcakes in the park. Or, the closest version of a park you can find.
These are photos of cupcakes from Baked by Melissa. If you live in NYC, or visit here anytime soon, check these out, the frosting is fantastic. 

Confession? I didn't share these. I ate three, by myself while sitting on a bench in Union Square. Because it's good to slow down and enjoy the scenery once and a while. And because there has never been anything bad about a cupcake. 
Plus, these are mini cupcakes. See? 
As I'm sure you know, a girl can eat at least four of these mini cupcakes and its just like eating one. Of course, eating multiple mini cupcakes in a row can be a slippery slope. Don't say I didn't warn you.

My point is, cooking is fantastic. I love it. If you're reading this blog, you probably love it too (or you love me and you're just being supportive). Cooking is a stress release for me and a good way to unwind. But every once in a while, eating mini cupcakes in a park...well, that's pretty great too. Enjoy the rest of your week!

Saturday, June 4, 2011

Toffee Cookie Bars

My mother discovered the recipe for these cookie bars when I was 10 years old. We took a road trip to Canada soon after and distributed them to my relatives as we met them. Now, more than a decade later, these bars are still mentioned at family visits. I kid you not. They have chocolate and toffee and nuts and cookie and caramel. What more could a (cookie-bar loving) girl ask for? 
This is one of those recipes that produces an easy take along item (hence the reason we brought them on a road trip to Toronto). These are great for bake sales, family reunions, treat days and of course (and most importantly), bribery. 
Toffee Cookie Bars
By Skor Toffee, Adapted by Alexandra Rogers


Ingredients
2 1/2 cups all-purpose flour
2/3 cup firmly packed light brown sugar
3/4 cup butter or margarine
1 large egg, slightly beaten
2 cups semi-sweet chocolate chips divided
1 cup coarsely chopped pecans
1 (14 oz.) can sweetened condensed milk
1 (8 oz.) package of milk chocolate covered toffee baking bits*
butter for greasing pan


Recipe
1. Preheat oven to 350 degrees fahrenheit. Grease a 9 x 13" baking pan and set aside.
2. In a medium container, mix chocolate chips and chopped nuts together. Set aside. Also set aside 1/4 cup of toffee bits.
3. In a large bowl, mix flour and sugar together. Add butter, chopped into tablespoon-sized pieces and smoosh it into the mixture with your fingers, until it resembles fine crumbs. Add the egg and mix well with a fork.
4. Stir 1 1/2 cups of the chocolate chip/nut mixture into the crumb mixture. Once thoroughly combined, reserve 1 1/2 cups of the dough mixture and set aside. Press the remaining crumb mixture onto the bottom of the 9 x 13" pan. Bake for 10 minutes.
5. Pour sweetened condensed milk over the partially baked crust, spreading with a spatula to make sure it evenly coats. 
6. Sprinkle toffee bits (everything you have except the 1/4 cup you set aside in step 2) over the layer in the pan. 
7. Sprinkle the reserved crumb mixture and remaining chocolate chip/nut mixture over the top. 
8. Bake for 30-35 minutes until golden brown on top. Sprinkle with the remaining 1/4 cup toffee bits.
9. Let cool, then cut into 1" x 2" rectangles and serve. Makes approximately 24 cookie bars.


*If you can find toffee baking bits that are not covered in chocolate, those would be better--and are what the original recipe calls for. I believe these have been discontinued because I haven't found them for years, but if you can find them, more power to you. Also, if you find them, will you please tell me where so I can go stock up? 

Tuesday, May 3, 2011

Mother's Day Gift Ideas: for the chocoholic mother

Is your mother a chocoholic? Mine is.That might explain the prevalence of rich, chocolate recipes on this blog. (Wondering why I'm rambling about my mother? It is not only because she is awesome, but also because it's mothers day on May 8th. You should probably do something about that...I've come up with some ideas for you.)

1. Indulgent Chocolate Brownies--These are from a recipe perfected, fittingly, by my mother. Man, is she the queen of chocolate desserts...They've gotten stunning reviews from my followers, so I'd really encourage these. Plus, they're mailable.

2. Chocolate Cookies with Peanut Butter Chips--Never had a good reason to buy peanut butter chips before? (Seriously, do you need a reason?) Well, anyway, these are it. Also, they're mailable.


3. Double Chocolate Loaf with Peanut Butter Cream Cheese Spread--Peanut Butter Cream Cheese Spread + Double Chocolate Loaf Shaped Dessert? That, my friends = heaven. Simple math, really.


4. Chocolate Pots de Creme & Almond Wafers--This is a recipe from Just A Taste, by Kelly Senyei, and it is almost as adorable as it is show-stopping. Don't skimp on the almond wafers, you'll want extra. And check out Just A Taste, it is one of the blogs that inspired to me to get started. I made these on Mother's Day last year and they went over very well.


Now, you may be thinking--this is all well and good but my mother lives miles, hours, even continents away. Well, my good people, that is what the U.S. Postal Service is for. (or Fed Ex, or whatever is most painless for you). Options #1 and #2 are easily shipable and should stay good for quite a few days after baking. And think of how happy mom will be to receive a care package from YOU, instead of the other way around! Options #3 and #4 are recommended for close-by mothers, since they would be significantly harder to ship.

Sunday, May 1, 2011

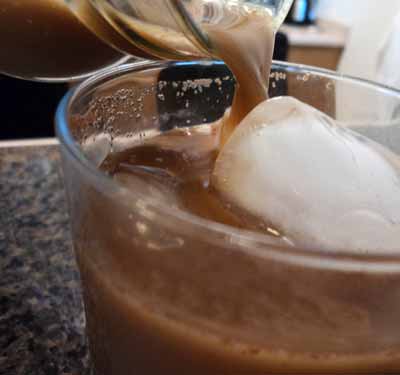
Magic Coffee


Once upon a time, in a town called Madison, WI there existed a lovely cafe named Cafe Soleil. This cafe had beautiful quiche and daily soups and the best damn almond croissant I've ever had. In my whole entire life. But what really set it this place apart, more than anything else, was the magic coffee.  
Yes, they actually called it that. Though Cafe Soleil has sadly vanished, Graze on the capitol square (another baby of awesome, recent James Beard Award Nominee Chef Tory Miller) does still offer magic coffee (and those equally magical almond croissants). I had the good fortune of learning a little bit about the secret recipe behind magic coffee from a source who shall remain unnamed, and-although I don't make it exactly the same-I think my version is pretty. darn. good. Seriously people, who couldn't use a change in their daily coffee routine? Give it a try--it still gives you quite a kick, but it tastes...well...magical. There's also a cocktail based on this, wait for that, because I promise when I post that cocktail recipe, it will be legendary. 
Magic Coffee
By Alexandra Rogers
Inspired by the Magic Coffee at Graze


Ingredients
1-1/2 cups freshly brewed coffee
1/2 cup milk (you choose--I like skim but the fattier the milk the creamier the drink)
1-1/2 Tablespoons brown sugar (do 2 Tablespoons if you like your coffee to taste more like sugar than coffee)
1/2 teaspoon cinnamon
dash nutmeg


Recipe
Combine all ingredients in a jar or tightly sealed tupperware container and shake. Place in refrigerator for about 1 hour. Serve over ice on a hot summer day! Serves 2.

Sunday, April 17, 2011

Chocolate Cookies with Peanut Butter Chips

The last few weeks were a little rough. I barely saw my kitchen, my bed or my boyfriend. Meanwhile, my little graduate school community was experiencing quite a few hardships. So, I decided to bring cookies into school. Because cookies make everything better.
There is something about getting lost in the ritual of baking that calms me down. It's funny, because I don't consider myself a baker (I'm much more natural as a cook because I tend to think of measuring as an option). Maybe growing up in a house where my mother baked to solve problems or soothe heartache actually rubbed off on me. I love the smell of butter and sugar coming together, and the way the aroma of vanilla extract rises out of the bowl as I add it. Snacking on dough while rounding spoonfuls of batter onto a cookie sheet is sweet (pun intended). Concentrating on getting the right amount of flour and baking soda and salt puts my mind in the kitchen and nowhere else. I'm hoping the people that eat these cookies will have a moment of relief as well. 
Chocolate Cookies with Peanut Butter Chips
By Reese's


Ingredients
2 cups all-purpose flour
1 teaspoon baking soda
3/4 cup cocoa powder
1/2 teaspoon salt
1-1/4 cups (2 1/2 sticks) butter, softened
2 eggs
1-2/3 cups (10 ounce bag) peanut butter chips
2 cups sugar
2 teaspoons vanilla


Recipe
Preheat oven to 350 degrees Fahrenheit. In a medium bowl, mix together flour, baking soda, cocoa powder and salt, then set aside.


In the bowl of a standup mixer, beat butter and sugar together until fluffy and well combined. Add eggs, one at a time, then add vanilla. Once wet ingredients are well combined, add the dry mixture slowly. 


Once all ingredients are well combined, add peanut butter chips. Drop rounded teaspoons of dough onto ungreased cookie sheets. Bake for 8-10 minutes. Do not bake over 10 minutes. The cookies will rise in the oven, but will fall while cooling. 


Makes approximately 4 dozen cookies. Maybe more, if you don't eat the dough while cooking, like I did...Enjoy with milk.

Tuesday, March 29, 2011

Oatmeal Yogurt Muffins with Cranberries and Pecans

The other day, I was craving muffins. I've added working out regularly to my morning routine, and although I couldn't be happier with that choice, it leaves little time to think about breakfast before I run out the door. 
I know muffins aren't the best option for every day, but I've been living off of egg white scrambles and bananas for a little too long now, and I just wanted a treat. Of course, since it is National Nutrition Month, I searched for a healthier way to do muffins, and found some inspiration here. I changed it around to suit my tastes, and I love the results!
I love these dense muffins, and I hope you will too. This recipe is easy to make substitutions with, especially the nuts and dried fruit. Feel free to try any combination that suits your tastes. 
Oatmeal Yogurt Muffins with Cranberries and Pecans
By Alexandra Rogers


Ingredients
1 cup rolled oats
1 cup all-purpose flour
1/2 cup packed brown sugar
1/2 teaspoon salt
1 teaspoon baking powder
1/2 teaspoon baking soda
1/2 teaspoon cinnamon
1/4 cup finely chopped pecans, toasted
2/3 cup craisins (original)
1 stick unsalted butter, melted and cooled to room temperature
1/4 cup skim milk
3/4 cup plain, non-fat yogurt
1/2 teaspoon vanilla extract
1 large egg, beaten


Recipe
Preheat oven to 400 degrees Fahrenheit and grease a 12-cup muffin tin. 


In a large bowl, mix together rolled oats, flour, brown sugar, salt, baking soda, baking powder, cinnamon, pecans and cranberries.


In a small bowl (or cup), mix the yogurt and milk together with a fork until the consistency is smooth and slightly less thick than yogurt. In a medium bowl (I used my mixer for this), combine the yogurt/milk mixture, the melted butter (cooled to room temperature, but not back to solid state), and the vanilla. The mixture will look yellow and possibly slightly curdled. That's okay, that is what you're looking for. Pour the liquid mixture into the dry mixture and mix for no more than 10 seconds--just enough to bring the mixture together. It should still be lumpy. If you over mix, the muffins will be tough. 


Use 1/4 cup measure to pour the batter into the prepared muffin tins. Bake for 15-18 minutes, or until a toothpick inserted in the center comes out clean.  Let cool in the pan for approximately 5 minutes, then cool all the way to room temperature on a drying rack. Makes 12 muffins. 

Nutrition Facts: 1 muffin=1 serving
Amount Per Serving: Calories 220.1; Total Fat 10.4 g; Saturated Fat 5.2g; Polyunsaturated Fat 1.0g; Monounsaturated Fat 3.4 g; Cholesterol 36.1 mg; Sodium 399.5 mg; Potassium 108.9 mg; Total Carbohydrate 31.8 g; Dietary Fiber 1.8 g; Sugars 18.3 g; Protein 4.0 g.


Tuesday, March 22, 2011

Candied Pecans

I know, I know, it is National Nutrition Month. No place for anything candied, you say? I beg to differ. These make a welcome addition, in moderation, to the Mixed Greens Salad I am posting this week. They add a much needed deep sugar flavor and intense crunch. They are also lovely to munch on (again, in moderation) if you need a small fix of something sweet. 
Candied Pecans
By Alexandra Rogers

Ingredients
1 1/2 cups chopped pecan pieces, toasted (at 350 degrees Fahrenheit for 5-7 minutes)
1/2 cup sugar
1/8 teaspoon kosher salt 
 
Recipe
Prepare a baking sheet lined with parchment paper and have two forks nearby. Set aside, very near the stove.

Pour sugar into a small pot. Cook sugar on medium heat, stirring with a wooden spoon. The sugar will begin to melt, and within a few minutes will begin to turn an amber color. When the sugar has just turned amber (no white sugar should be left) pour toasted pecan pieces into the pot and stir very quickly to coat pecan pieces with sugar mixture. Once the nuts are coated (this should happen within 30 seconds), pour the pecans onto the parchment paper-lined baking sheet and work quickly with a fork to separate the clump into separate pieces. After about 1 minute, sprinkle with salt.

Saturday, March 19, 2011

Crêpes

During summertime in New York City, there is a rotating street fair. Happenstancing upon these random markets is one of those little luxuries in life and most of the luxury comes from one reliable presence at these street fairs: crêpes, prepared when you order, as you like them, and wrapped in a little cone. I can't tell you how many times I have shown up to work with powdered sugar all over my face because I tried to eat a crêpe (and succeeded) while running up first avenue. 
Anyway, point is, crêpes are delightful. I'd been craving something sweet after cooking tons of savory, healthy recipes in honor of National Nutrition Month, when I realized: crêpes are light, not to sugary at all and make for a sweet and guilt-free end to a healthy meal. I get to missing dessert sometimes, and I figured you might too. Plus, making crêpes is an undeniably awesome party trick. They're really easy to make, but let's just keep that our little secret, okay?


Crêpes
By Alton Brown


Ingredients
2 large eggs
3/4 cup skim milk
1/2 cup water
1 cup flour
2 Tablespoons butter, melted
Butter for coating the pan


Recipe
Mix all ingredients together in a blender (pulse for 10 seconds) or whisk together in a large mixing bowl until thoroughly combined. Refrigerate mixture for 1 hour (it will keep as batter for 48 hours).


Pull batter from fridge and heat a crepe pan over medium/medium-high heat. Coat the pan with butter. Once the pan is hot and the butter is melted, use a 1/4 cup measure to make each crepe. Pour mixture into pan and swirl around very quickly. (It might take you a couple tries to get this right. Don't worry about it. Practice makes perfect.)  Cook for 30 seconds, until slightly browned on bottom side. Flip and cook for another 10-15 seconds. Slide the crêpe off the pan and onto a cutting board (lay flat) to cool.  Yields about 10 crepes. 


I garnished mine with lemon juice, sugar and fresh raspberries. Other sweet options include a light spread of nutella (otherwise we can't call it healthy anymore) and fresh cut bananas. These crêpes can also be made savory via toppings.


Enjoy!

Tuesday, March 1, 2011

Key Lime Pie

Hello readers. I'm writing today to ask you for help. What started as a citrus-phase (as seen here) has now gone spinning out of control into a pie phase. There are two slices of this key lime pie left sitting in my fridge and I am doing everything I can not to finish the pie tin and lick it clean. Do any of you happen to have some extra self-control you can lend me? I'm a sucker for a graham cracker crust. 
Especially a graham cracker crust with coconut. And the creamy, tangy filling in this pie? Well, I'm a sucker for that, too. This recipe is made with regular, grocery store limes, instead of juiced key limes or persian limes. My mother has perfected it, adapted from The New Best Recipe cookbook. We like to serve it with a bowl of freshly whipped cream and allow guests to garnish their own slice, instead of pre-decorating the pie.There's nothing like topping your own slice of heaven with a gigantic spoonful of airy whipped cream. 
Key Lime Pie
Adapted by Marcella Rogers from The New Best Recipe

Ingredients
Lime Filling
4 teaspoons grated lime zest
1/2 cup strained lime juice (from 3 or 4 regular limes)
5 large egg yolks
1 (14-ounce) can sweetened condensed milk

Graham Cracker Crust
9 graham crackers (5 ounces), broken into rough pieces
2 Tablespoons granulated sugar
5 1/2 Tablespoons unsalted butter, melted
1/3 cup unsweetened coconut 

Whipped Cream Topping
3/4 cup heavy cream
1/4 cup confectioners sugar
1/2 lime, sliced paper thin

Recipe
Whisk zest and yolks in a medium glass, plastic or clay bowl for about 2 minutes, or until it takes on a light green color. Beat in milk and lime juice. To thicken, set aside at room temperature for at about 30 minutes.

Heat oven to 325 degrees Fahrenheit and adjust oven rack to center position. In a food processor, pulse graham crackers until they are fine crumbs (about 30 seconds)--this should result in 1 cup of crumbs. Add the sugar and coconut, then slowly add the butter. Pulse until the mixture resembles wet sand. Press mixture into a 9-inch pie pan, evenly. cover with saran wrap and refrigerate lined pie plate for at least 20 minutes to firm up the crumbs. Bake until lightly browned and fragrant, about 15 minutes. Cool pie crust to room temperature--this will take at least 20 minutes.

Now, your lime filling should have thickened a bit. Pour the lime filling into the prepared graham cracker crust and bake at 325 degrees Fahrenheit until the center of the of the pie is set. This should take about 15-17 minutes. Let pie cool to room temperature, then refrigerate to chill (for at least 3 hours). 

Right before serving (within an hour), make your whipped cream. In a mixer fitted with the whisk attachment, whip the heavy whipping cream until it forms soft peaks. Gradually add the confectioners sugar while whipping. Serve the whipped cream with your key lime pie and garnish with thinly cut lime slices, if you wish. 

This pie can be covered with plastic wrap and refrigerated for up to one day. 


Serves 8-12  (depending on how big you cut the slices).

Tuesday, February 22, 2011

Double-Chocolate Loaf with Peanut-Butter-Cream-Cheese Spread

I've had this recipe bookmarked since October, 2010. I've admired it numerous times but it seemed too sinful  rich irresistible to have in our home. Because, although I'm not the most diet-friendly cook (as seen here, here and here), I don't think it wise to have a double-chocolate-loaf with peanut-butter-cream-cheese spread just sitting around. Nobody has that much self control...
So, I waited. I knew the perfect opportunity would roll around. And, people, of course it did.  I enrolled in a class that meets in the late afternoon and has a treat schedule. It is my turn to feed the class tomorrow. My classmates are going to love adore me. Of this, I'm certain.
Isn't there something lovely about a sweet loaf? It seems less sinister and unhealthy than a slice of cake because..well, it is shaped like bread. I think my love for sweet, loaf shaped desserts stems back to a childhood filled with delicious zucchini bread. My aunt would serve it warm from the oven, and we'd slather on cool, creamy butter. Now that is a quick bread memory.
This is no zucchini bread, but it does find a balance between all the good things in life.The chocolate is so dark, the flavors so deep, that they flirt with bitter. But, only enough to balance out the sweet peanut butter flavor of that heavenly peanut-butter-cream-cheese spread. (seriously, with a name like that, could it be anything other than heavenly?) If you want to make it, but need an excuse, I can almost guarantee that this bread will make you instantly popular at your place of work (or study).

This delightful recipe is taken from Baked Explorations: Classic American Desserts Reinvented, which was written by Baked's Matt Lewis and Renato Poliafito. It came to me via my TastingTable NYC daily email.
Double-Chocolate Loaf with Peanut-Butter-Cream-Cheese-Spread
Adapted by Tasting Table NYC from Baked Explorations: Classic American Desserts Reinvented
(Stewart, Tabori & Chang)


Ingredients
Double-Chocolate Loaf:
3/4 cup tightly packed dark brown sugar
1 cup dark unsweetened cocoa powder
1 1/2 cups all-purpose flour
3/4 cup granulated sugar
1 1/2 teaspoons baking soda
3/4 teaspoon baking powder
1 teaspoon salt
2 large eggs
1 large egg yolk 
3/4 cup buttermilk
1/2 cup vegetable oil
1 teaspoon pure vanilla extract
8 ounces good-quality dark chocolate (60 to 72%), coarsely chopped


Peanut-Butter-Cream-Cheese Spread:
*I adapted this from the original recipe*
8 ounces cream cheese, softened
6 Tablespoons creamy peanut butter
1/3 +1/6 cup granulated sugar


Recipe:
Double-Chocolate Loaf
Butter and flour a loaf pan (9"x5"). Preheat oven to 350 degrees Fahrenheit.


Put the brown sugar in a bowl, preferably a mixer bowl fitted with the paddle attachment. Use the back of a kitchen spoon to press out any lumps in the brown sugar. Then, add the granulated sugar, cocoa powder, flour, baking soda, baking powder and salt. Mix together with paddle attachment, making sure to scrape down the sides of the bowl.


In another bowl, whisk the egg yolk and eggs together thoroughly. Add buttermilk, oil, and vanilla extract, beating together quickly. Once the liquid mixture is smooth and combined, slowly add the mixture to dry ingredients in the mixing bowl. The mixture should be on low and you should mix only until the ingredients have combined. Leave the lumps! Remove the bowl from the mixer and fold the chopped chocolate bar in by hand. 


Pour the batter into a buttered and floured loaf pan and bake in a 350 degree Fahrenheit oven for 1 hour, or until a toothpick or knife inserted in the center of the loaf comes out clean.


Let the cake cool in the pan for 15 minutes, then remove from the pan and allow to cool completely.


Peanut-Butter-Cream-Cheese Spread
In the bowl of a standing mixer, add cream cheese, peanut butter and granulated sugar. Use the whisk attachment to beat the ingredients together until fluffy and well-combined. Spread this mixture on the chocolate loaf and you are golden.
Related Posts Plugin for WordPress, Blogger...